February 2025 Update: Amazon has recently announced that both the Kindle Comic Creator and Kindle Kids’ Book Creator will be phased out (and Mobi files will no longer be accepted after March 18, 2025) and that going forward, authors/publishers should use the Kindle Create program (the program I ended up using for Theodore after my original nightmare with Kindle Kids’ Book Creator). The process I originally posted for creating your picture book with Kindle Create is still relevant and can be found below.
Original Post:
Nearly one month after posting about my Kindle debacle for the new release of our children’s picture book Theodore, The Sloth Who Wants to Race, I am pleased to provide you, Dear Reader, with an update and tutorial on best practices for creating a picture book through Amazon’s Kindle Create. This is of course based upon my own experience, but I think what I’ve learned should apply to most picture books published in Kindle format.
If anyone has a question after reading this, or would like further details on a specific issue, please just leave a comment and I’ll get back to you. I’m going to walk through the process step by step, from the approach of creating a Kindle picture book for the first time. Hopefully, this proves helpful and saves you the mental anguish (and weeks of time) I went through!
What NOT to do when creating your Amazon Kindle picture book, based upon my experience:
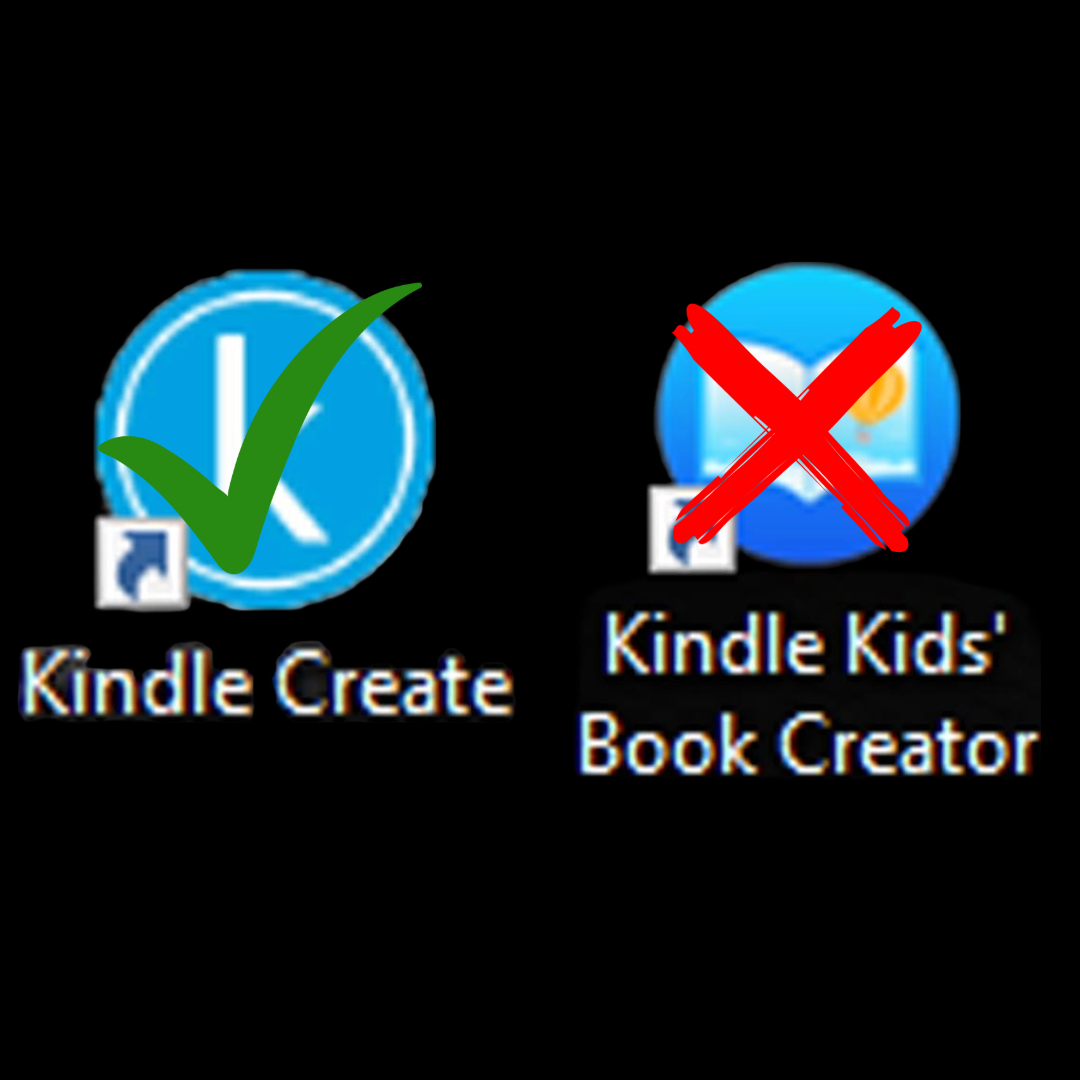
DO NOT use Amazon’s Kindle Kids’ Book Creator. Yes, I know: That is completely counter-intuitive, and I only stumbled upon the solution thanks to Sam’s research.
Why not use Kindle Kids’ Book Creator? Because it will create your book in a fixed format that is NOT zoomable. Not only will your pictures look tiny on a phone, for example, but the only hope you’ll have for text actually being read is through the “pop-out” text option that is, in my opinion, clunky and not nearly as aesthetically pleasing as being able to simply zoom in.
Also, because, in some instances, the Kindle book created with Kindle Kids’ Book Creator will have strange glitches, such as random blank pages interspersed between the intended pages. Also-also, because the layout, for some users, becomes locked in vertical, thereby squeezing the horizontal, double-page layout into a vertical screen. See previous post for the travesty mentioned.
What you’ll want to do instead is use the plain-ole Kindle Create, the same Kindle Create for those of us who have also published “normal” books that are not graphic-heavy.
For those already familiar with Amazon KDP and how to create an upload-able file of your picture book, just skip to Step 4.
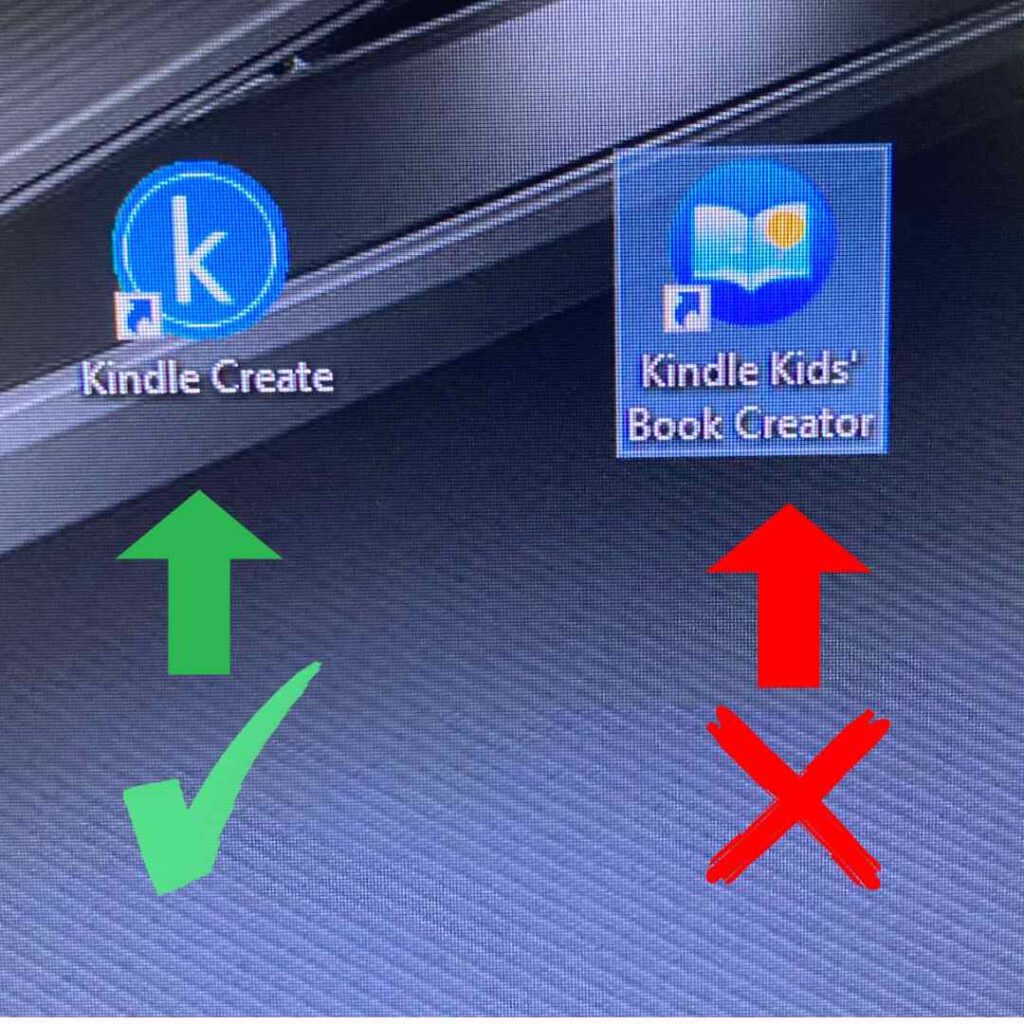
What TO DO when creating your Amazon Kindle picture book:
Step 1: Create your picture book file.
By way of example, our picture book is a vertical, 8.5×11-inch picture book with double-page spreads. So even though the book itself is in vertical format, it reads horizontally because of the page spreads. Here’s what the physical book looks like:
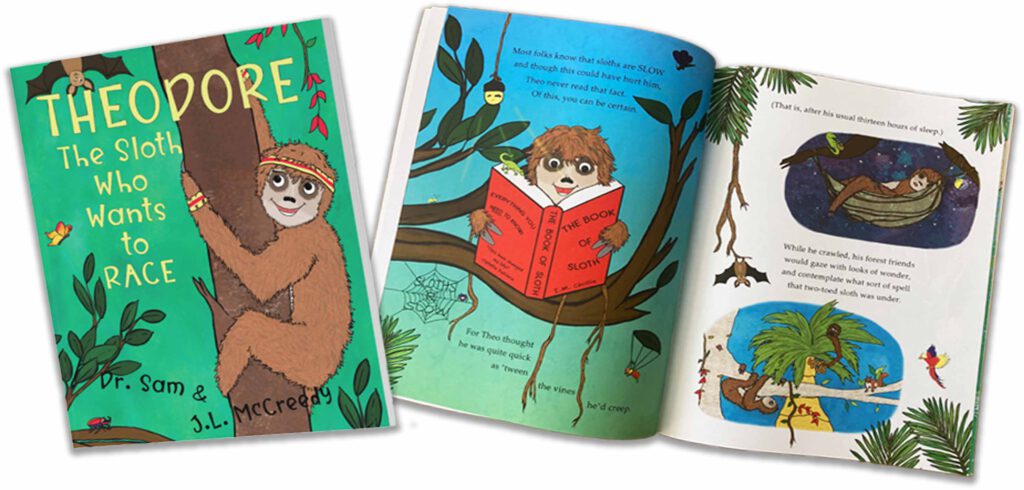
- So, I saved each of Theodore‘s pages individually as 8.5×11-inch, vertical, in PDF high resolution format. (Each page of Theodore was made at the dimensions described above, 300 pixels/inch and saved as PDF/X-1a:2001.)
- Then I highlighted all of Theodore‘s individual PDF files and combined them into one PDF. I did not include the cover in this file as you upload the cover separately.
- Unlike an ARC (“Advance Reader Copy”) whereby you likely will have saved your picture book in a much lower resolution, you want your Kindle PDF to be high resolution. Our 40-page PDF file, for instance, is 316 Megabytes (MB)!
- Congratulations! You now have your interior picture book file, ready to be uploaded into Kindle Create.
Step 2: If you have not already done so, you’ll need to open an Amazon KDP account.
Here’s what the landing page will look like:
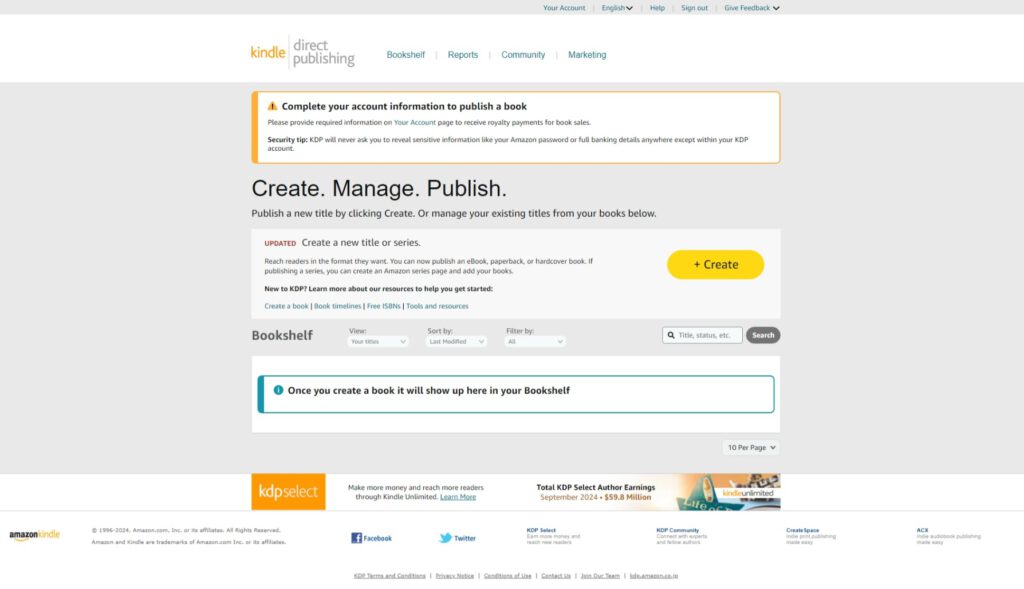
Step 3: Inside your Amazon KDP account, download the Kindle Create App.
You can find this in a variety of ways, but I went to the “Create a book” link and then did a search for Kindle Create. See below image.
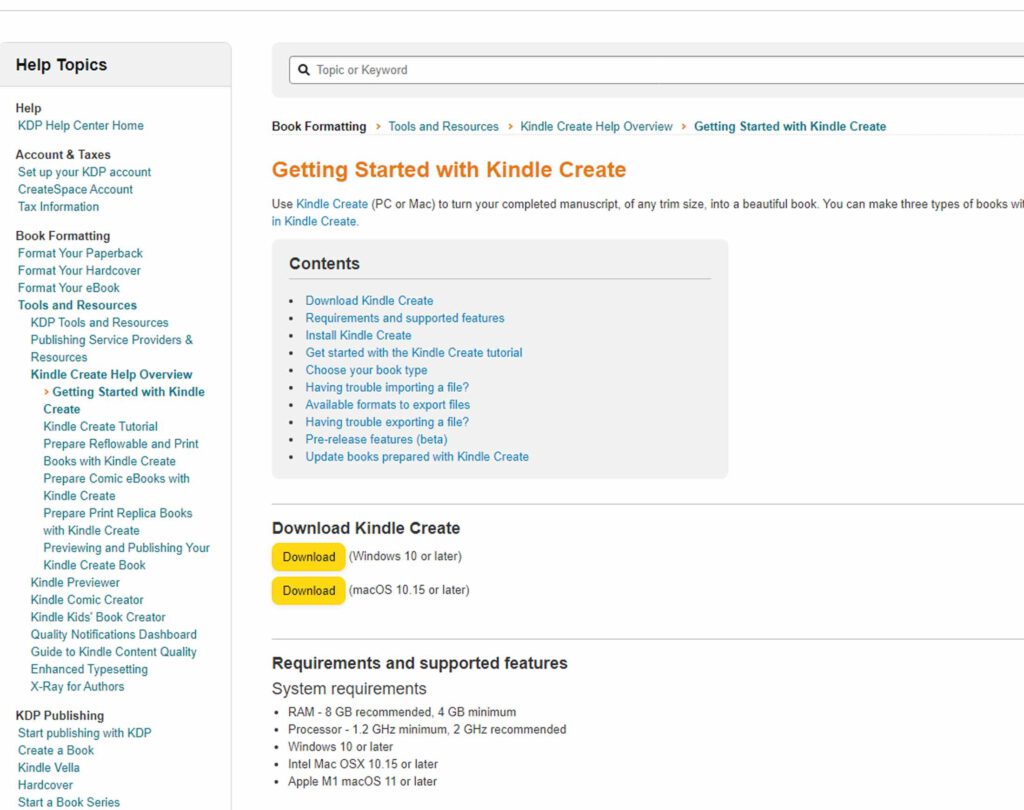
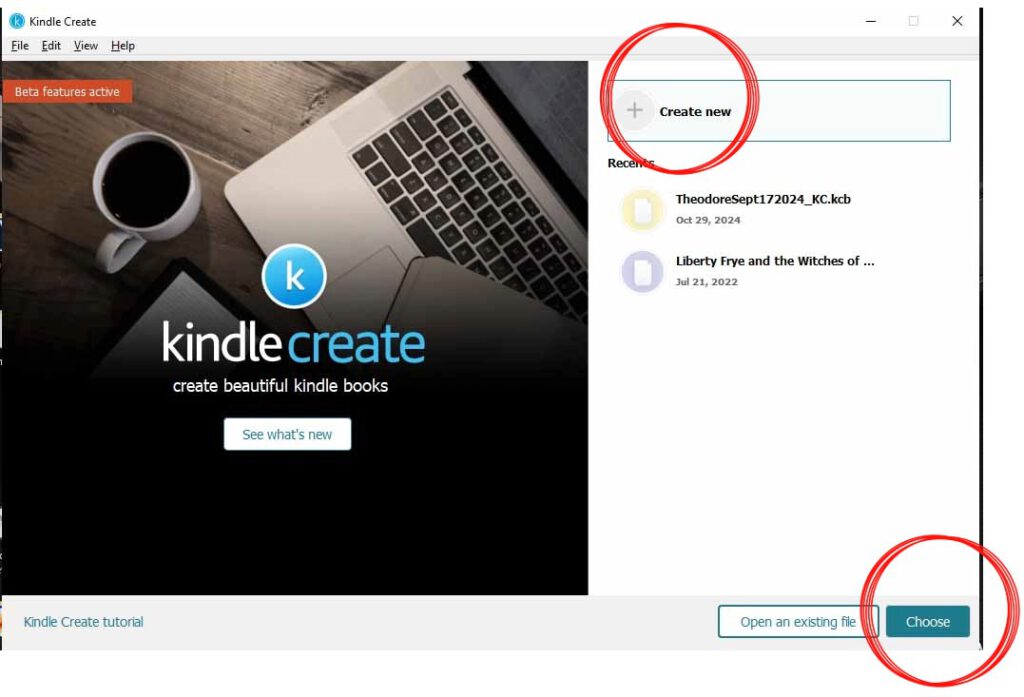
Step 4: Once Kindle Create is installed, open the app and select “Create New.”
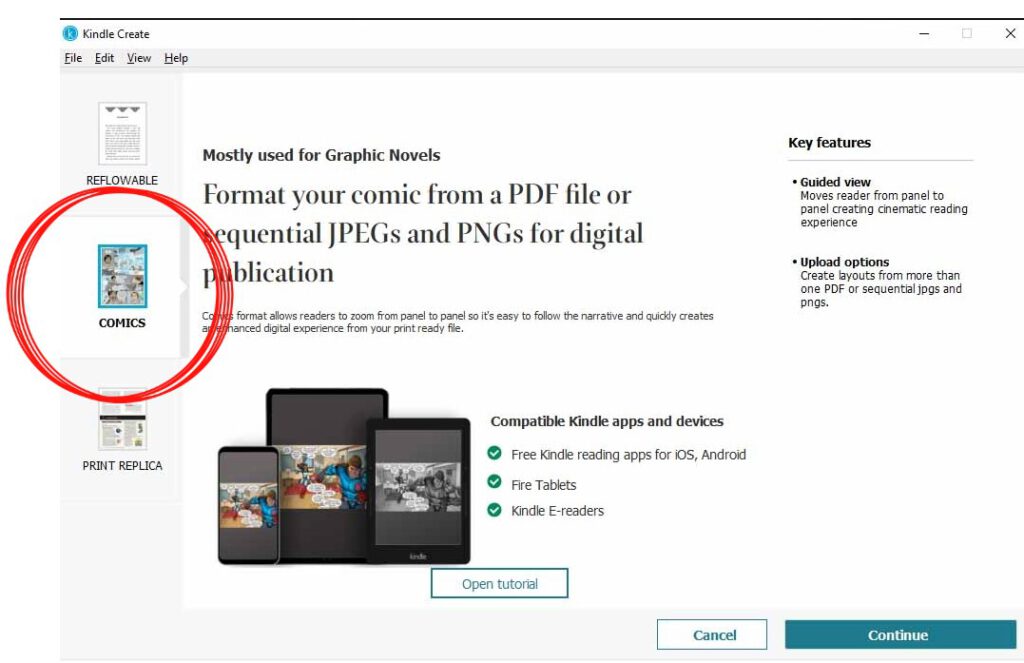
Step 5: Since this tutorial is specific to creating picture books, you will want to select the “Comics” option on the next page.
Then hit “Continue.” See below image.
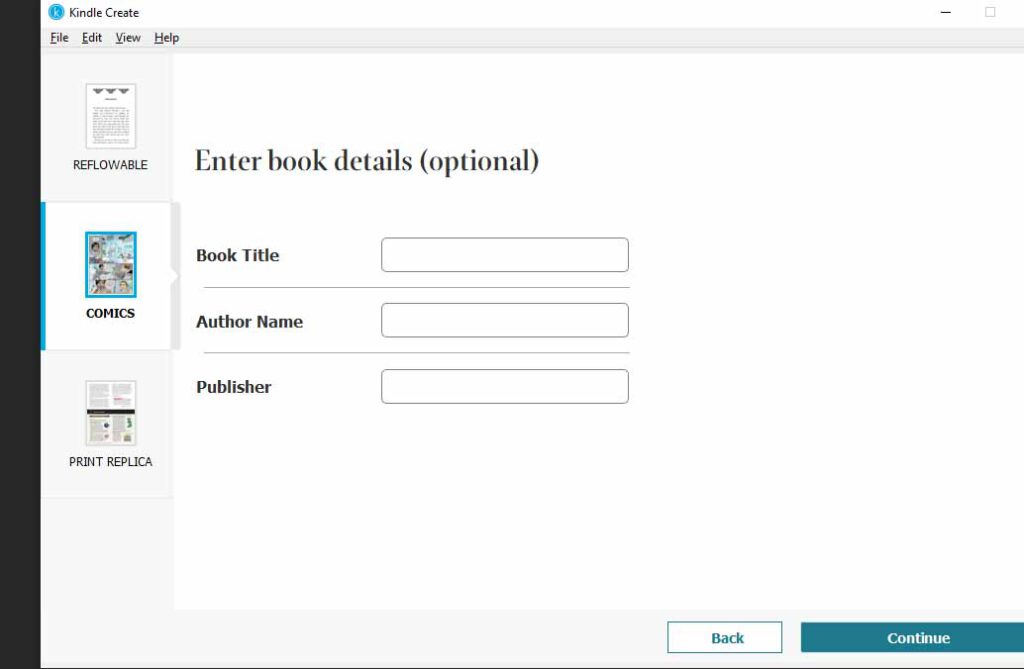
Step 6: Enter your book details (Title, Author and Publisher) within the spaces provided.
Then hit “Continue.” See below.
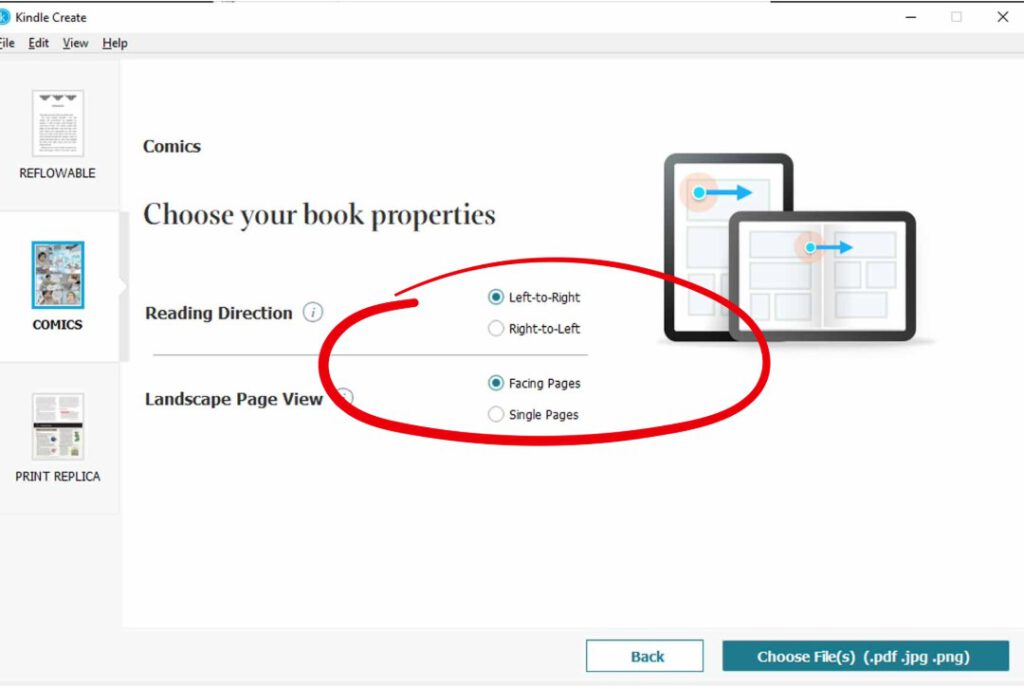
Step 7: If you have double-page spreads (as most picture books do), then you’ll most likely want to choose “Landscape Page View, Facing Pages.”
For most languages (including English), you’ll select “Left to Right” Reading Direction. See below.
Step 8: Upload your book files in PDF, PNG or JPG.
(I saved the entire interior of Theodore, including front and back matter but NOT including the book cover, as a single PDF file and then uploaded it.)
Step 9: Wait for the file to import and convert.
During this process, Kindle Create will show you demos of how to work with panels within the comic creator format. See below.
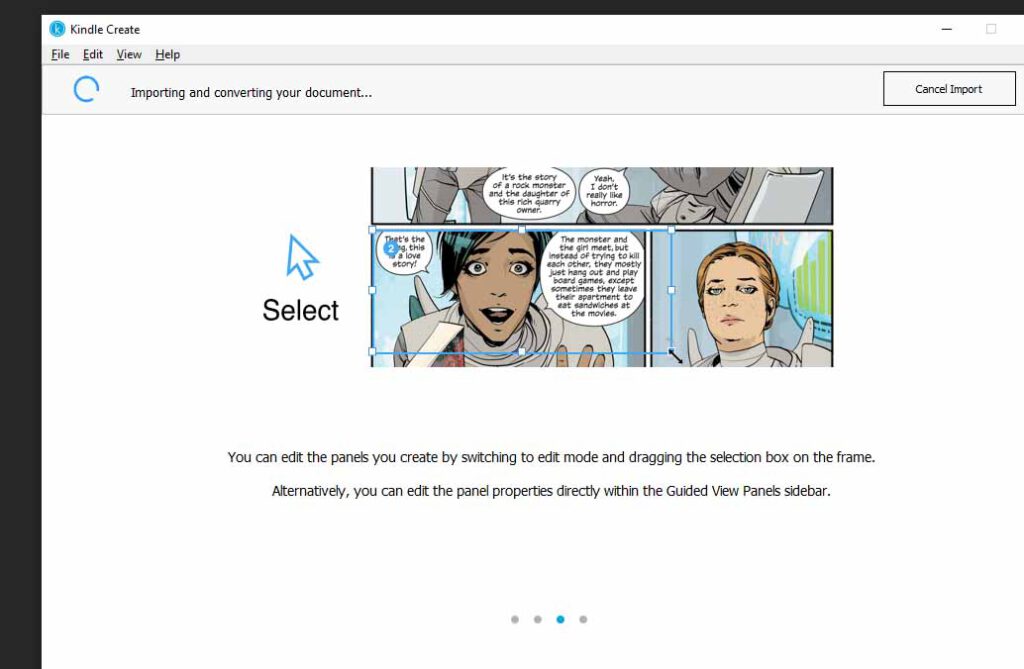
I just ignored this as I did not make use of the Panel function since my book is a picture book, not a comic.
Step 10: Rejoice in your beautiful, uploaded file! Woohoo!
Step 11: Scroll down the left side panel to select how you want each of your pages to be presented.
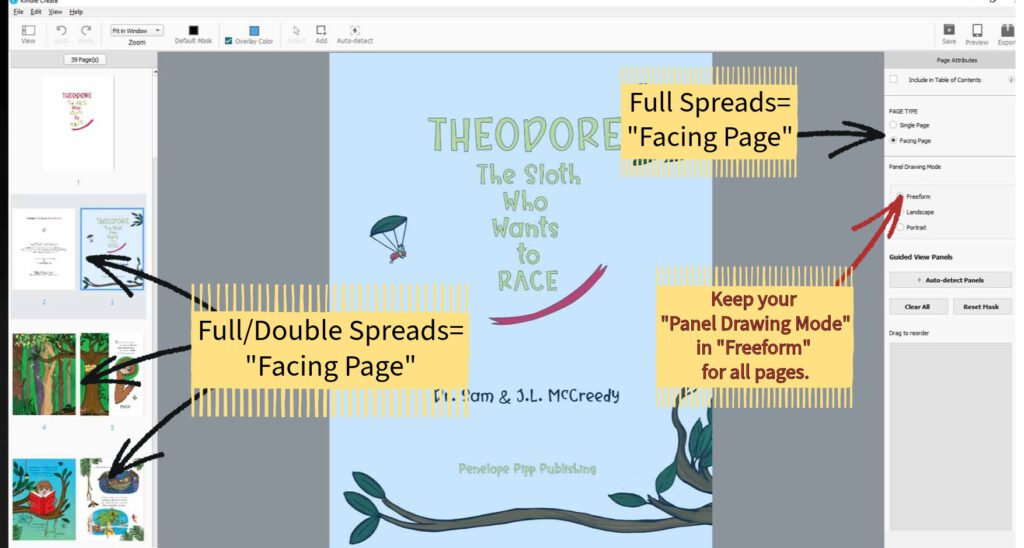
If you want a page to be displayed as a single page, select “Single Page.” If you want two pages to be displayed as a double-page spread, select “Facing Page.”
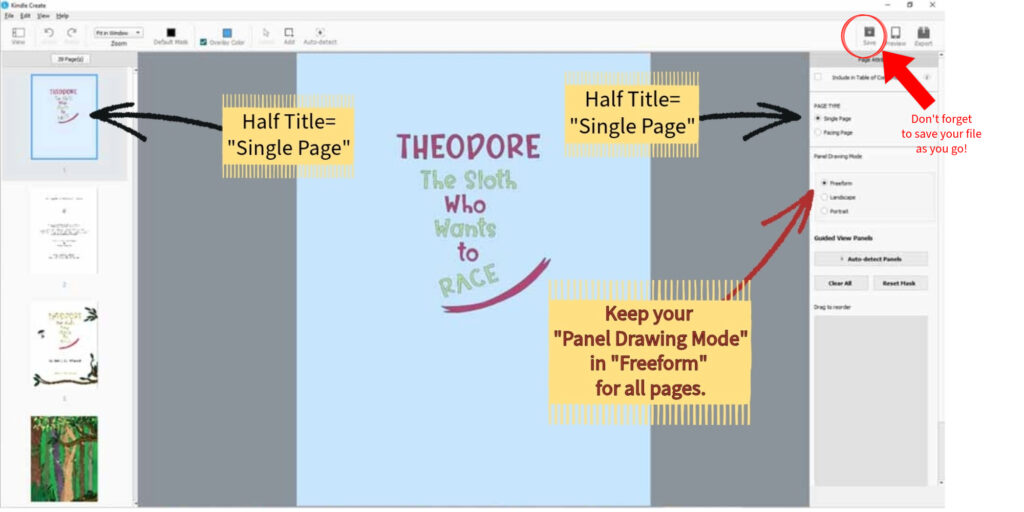
For example, Theodore has a half-title page which of course, in a traditional book, would be the very first page displayed on the right hand side as soon as you open the cover. I wanted it to be displayed by itself, so I chose Theodore‘s half title page to be displayed as a Single Page. (See black arrows in above image.)
Step 12: Choose your Panel Drawing Mode.
I wanted Theodore to be displayed in a flexible manner, so that the viewer may choose to see each page singly or to enjoy the intended double-spread layout. So I stuck to “Freeform” for all of Theodore’s pages. (See red arrow in above image.)
Step 13: Go through the rest of your pages and select the intended arrangement/layout.
As you can see, I chose double-spread “Facing Page[s]” for everything else that wasn’t back matter. (See below image.)
Step 14: Finish your backmatter in the same way.
Theodore has several educational-content pages (Thanks, Dr. Sam!) that I wanted to display individually for ease of reading, but then my last two pages are another double-spread. As you can see, you can easily switch between which pages you wish to display singly and which you want to display as double/full spreads. Easy peasy!
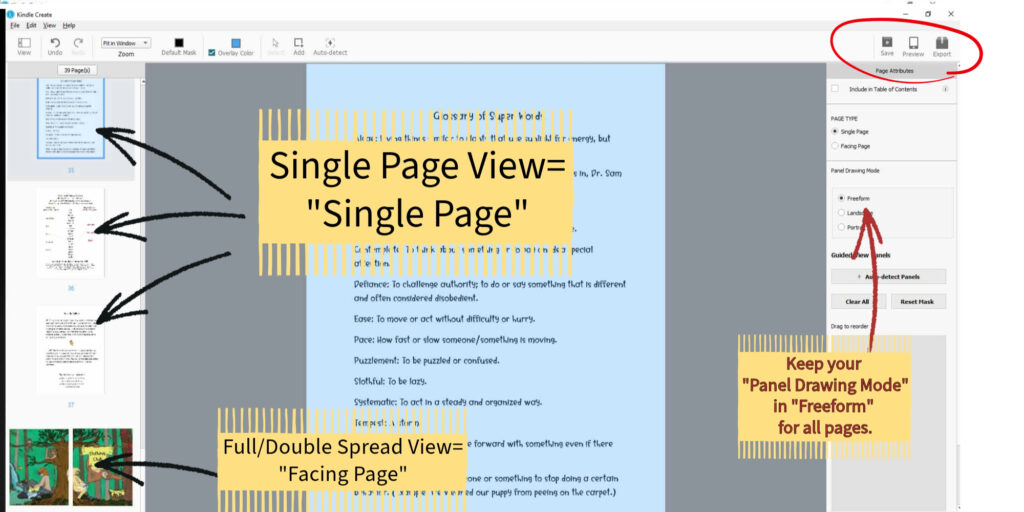
Step 15: Once you’ve got your layout as desired, save your file for a final time, run it through the “Preview” option (you may need to download the preview app from Amazon KDP) and then hit “Export.”
All three of these commands are found on the top right of the screen. (See red circle in above image.)
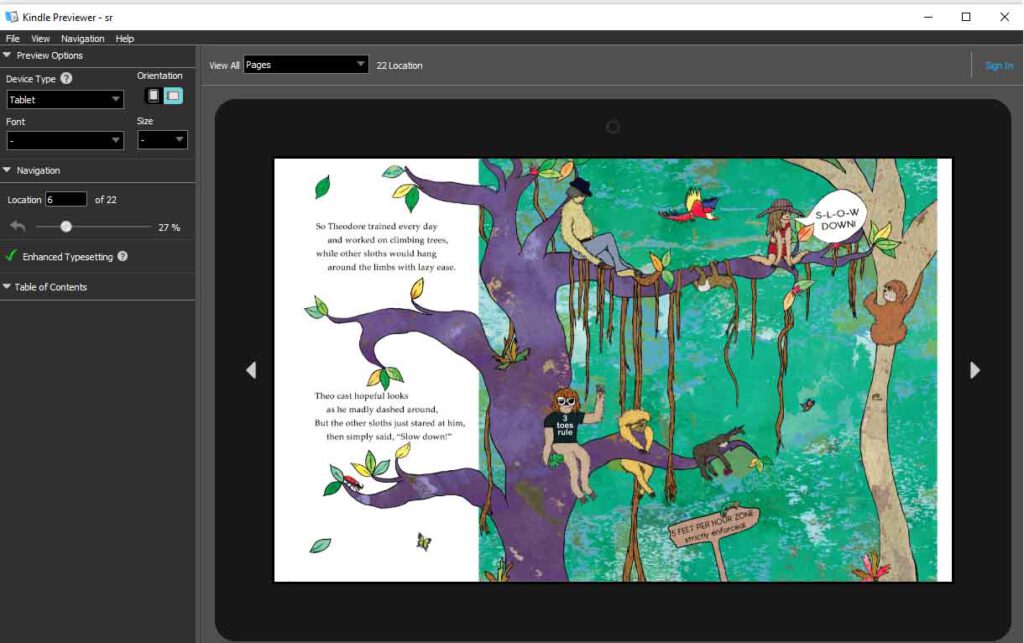
TIP: When you go to export, it will ask where you want your file saved. Browse and create a folder where you’ll know you can easily find your new Kindle file, and name it accordingly. You can also change the file name before saving. (For example, if our uploaded file was TheodoreSept24.pdf, when saving, I can change it to TheodoreOct29Tutorial or whatever best suits.) Your saved file will look something like this:

Step 16: Go to your Amazon KDP account, fill in all the information for your new book, and then upload your file!
Step 17: View your new book on your own device!
Once you’ve entered and uploaded all the required information into Amazon KDP and your file has been processed, you can see how it looks with previewers, of course, but there’s nothing quite as satisfying as seeing your fabulous new picture book on your own device. And it does a two-page spread beautifully!
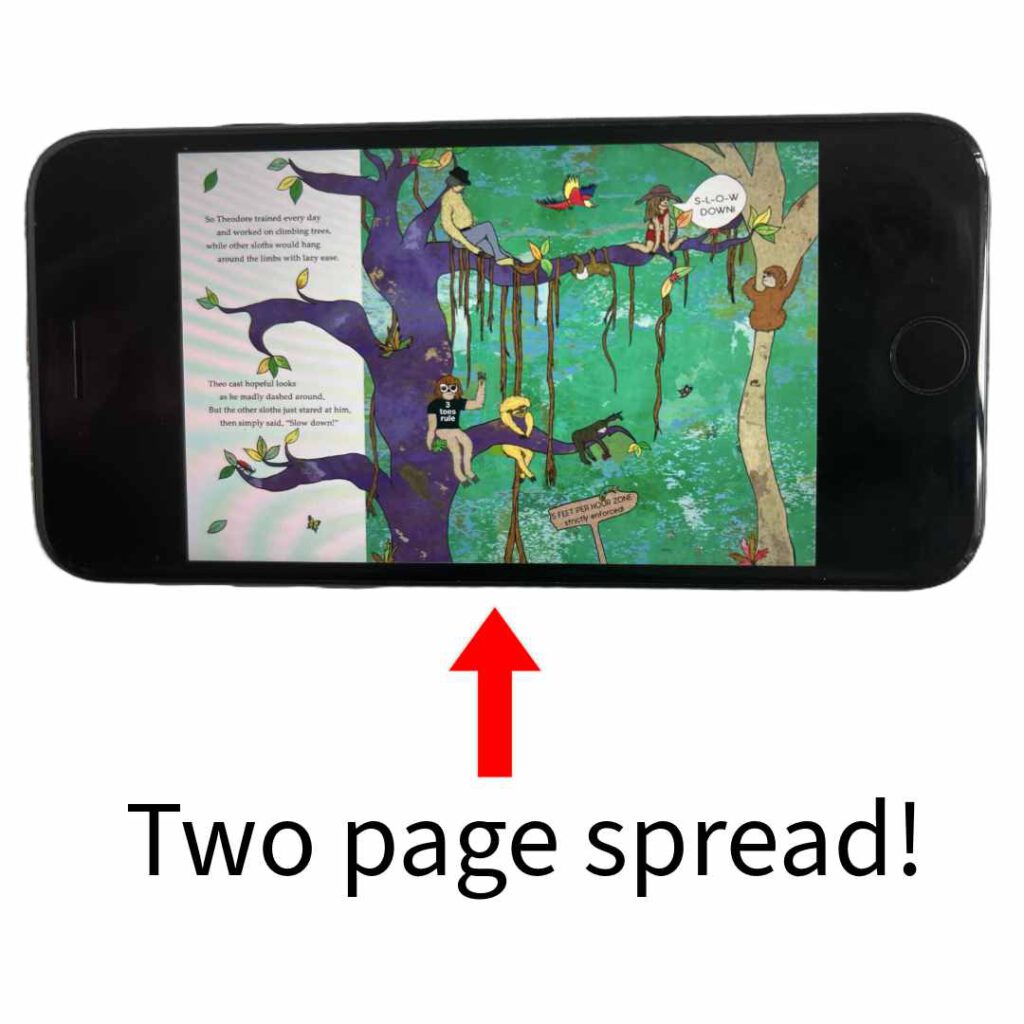
And here is where it gets SO COOL–especially if you, like me, previously suffered from the heartbreak of Kindle Kids’ Book Creator formatting:
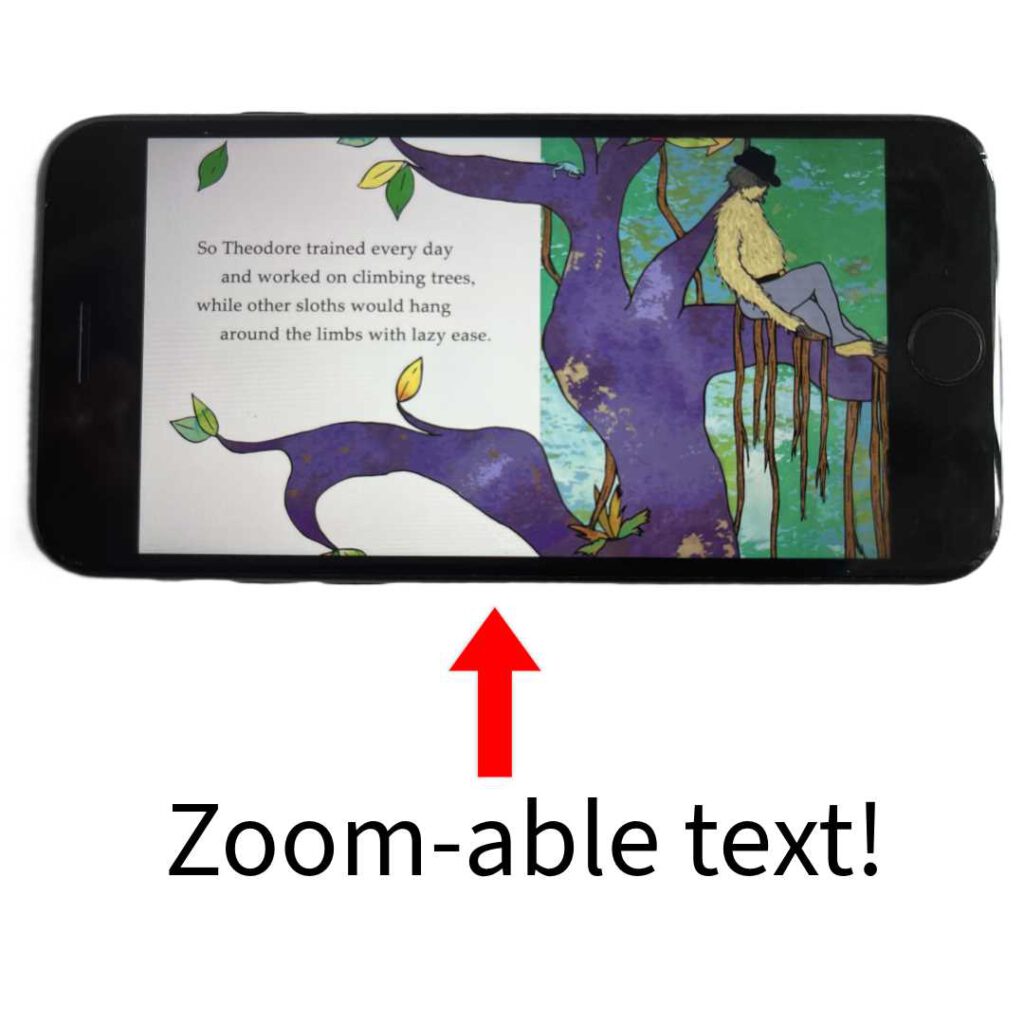
By creating your gorgeous book with regular Kindle Create’s “Comic” book selection, you can now ZOOOOOOM!
Two caveats about the picture book-making process through Kindle Create:
CAVEAT 1: DO NOT USE Kindle Comic Creator!
Is your head exploding? Hear me out. This tutorial walked you through creating a Kindle picture book through Kindle Create’s “Comic” format option. HOWEVER, there is another Kindle App found within Amazon’s KDP that is specifically called “Kindle Comic Creator.” It is a separate app that one may download and also use to create a graphic-centric book. I tried it, and it did not work as well as simply using Kindle’s mainstream Kindle Create app, then selecting the “Comic” format option as was demonstrated in Step 5 above.
CAVEAT 2: Potential Cache Issues:
If you already published your picture book through one of the other Kindle apps and are now republishing through Kindle Create, IN THEORY, any customer who has purchased your book SHOULD be able to update it and get the updated version. However, I found that a month after I’d republished Theodore through Kindle Create, some customers were still getting the old version, even though they had deleted the file from their Amazon library and then downloaded it again. This is unusual, but if it happens, have the customer reach out to Amazon’s customer service.
This is a copied portion of a chat whereby the Amazon customer service representative explained how he fixed the issue for one customer:
“I contacted our technical team and they manually updated it. Seems to be issue where the Kindle app cookies and cache is holding the older version whoever had it earlier.”
So there you have it.
Conclusion: Use Amazon’s Kindle Create for Picture Books.
Kindle Create proved a universe-apart from Kindle Kids’ Book Creator. The images are sharp, clear and 100% zoomable, making your wonderful creation easily viewed on any device. I still gaze in awe at Theodore‘s transformation from the regrettable first-run on Amazon’s Kindle Kids’ Book Creator to the extremely satisfying viewing experience on Amazon’s Kindle Create using the Comic book format option.
Whew! Was this tutorial helpful to you? Or do you have a question? Post your comment below so that we can all learn together.
#KindleCreate, #Picturebooks, #makingakindlepicturebook #kidsbooks #amazonkindlecreate #kindlekidsbookcreator


This whole experience of yours was soooo helpful for a newbie like me who was just wondering which one of the two software to use for my first book! A perfect tutorial! Heartfelt gratitude! 🙏✨
Glad it was helpful!